Teriyaki Cocktail Smokies – What a Nice Surprise!

Recently, my middle sister and her husband came for a visit. This is always cause to celebrate since they live in Eastern Central Oregon and we don’t see enough of them. The visit was a quick one – just a few days of visiting, playing games, swimming and most of all great family time.

Our youngest sister hosted a pool-side pot-luck for the final day of their visit. She was in charge of the appetizers, Dad’s wife (her mother) made a yummy crock pot pizza pasta while my contribution to this impromptu gathering was the salad and dessert. We all made garlic bread, a miscommunication between us that resulted in a mount of warm wonderful bread. Oh well, in our family warm bread never goes to waste.

Baby Sister had planned to make Little Smokies in a barbecue sauce. This is simple – dump cocktail smokies in a pot (quick method) or crock pot (slow simmer method). Pour on a bottle of your favorite barbecue sauce and warm everything together. Easy as can be and always a hit. She decided to use the crock pot method since it requires no tending, just time.

In went the smokies. Baby Sister grabbed a jar from the pantry and dumped its contents into the pot. It was at that moment she realized that she had made a mistake. Instead of grabbing the barbecue sauce, she had opened a jar of Teriyaki Glaze. Oh well, what was done was done – she hoped for the best.

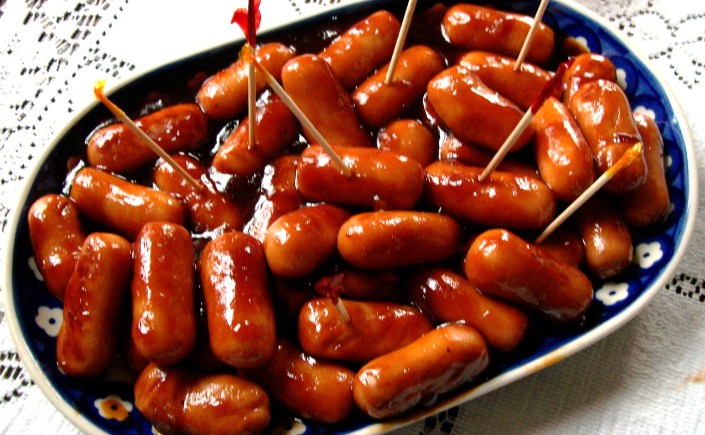
I’m here to tell you, her mistake transformed the “usual” little smokies into a delightful surprise. These were delicious. I’ve enhanced her boo-boo by adding some pineapple chunks to the mix. Bam! Little Sister gave us a new family favorite for our next gathering.

Teriyaki Smokies with Pineapple
2 Packages Beef Little Smokies
1 small can Pineapple Chunks, drained
1 Jar Teriyaki Glaze

Place Little Smokies and pineapple chunks into a slow cooker. Stir gently to mix sausage and pineapples together.

Pour Teriyaki Glaze over cocktail mixture. Give it one more gentle stir. Set crock pot to HIGH and heat for one hour.

Keep warm and serve directly from the pot or transfer to a nice serving bowl with a few cocktail skewers to get things going.

Warm Ham and Cheese Crescent Bites

Recently we enjoyed a wonderful Old-Fashioned Glazed Ham for supper. The smoked, bone-in ham weighed 12 pounds – more ham than our little family of three could eat in one meal. Since then, we’ve been taking ham sandwiches for lunch, and delighted in Omelettes for breakfast. I’ve made deviled ham spread to put on crackers. (Yum!)

One of Hubby’s favorite hot sandwiches has got to be Grilled Ham and Cheese on Buttery Garlic-Parmesan SourdoughThis got me to thinking, what else could I do with all that left-over ham? The Ham and Cheese Crescent Bites are essentially  a tiny grilled ham and cheese sandwich baked inside a crescent roll. Light, warm, flaky and oh so delicious. These little bites can be served as light supper at the end of a long day or the perfect TV-watching snack. It takes almost no time at all to whip up these little pockets of buttery goodness.  

Warm Ham and Cheese Crescent Bites
2 Cans Crescent Rolls
4 Tablespoons Butter, Melted
3-4 Garlic Cloves, pressed
2 1/2 Cups Chopped Ham
8 Slices American Cheese

Preheat oven to 350 degrees.

Cut ham into chunks easy to process in a food processor. Pulse ham until chopped into a coarse mixture. Set aside.

Cut American Cheese into fourths, creating 16 squares. Set aside.

Melt butter. Add pressed garlic cloves into the butter. Taste and adjust as needed with more garlic. Set aside.

Roll out 1 can of crescent rolls on a cutting board. Separate the first can into 8 triangles. Brush each triangle with garlic-butter. Spoon some of the chopped ham onto the wide end of the crescent roll (about 1 or 2 tablespoons). Press the chopped ham down slightly into the crescent dough to help hold the meat into place. Add one small square of American cheese on top of ham. Roll as you would a crescent roll. Press pointed end into completed roll, tuck sides in and press together to create a nice pouch around the filling. Place pouch on an ungreased baking sheet. Repeat until all 16 crescent triangles have been filled.

Place baking sheet into preheated oven and bake 12 to 15 minutes or until golden brown.

Serve warm from the oven and enjoy. (Hubby likes to mix a little ketchup and mustard together to create a “dip” for his bites).

Twice Baked New Potatoes with Caviar

Leave it to me to be a day late and a dollar short. Did you know that July 18th was National Caviar Day? Better late then never. Besides, it seems a good excuse to eat Caviar, right? These potatoes are similar to a twice baked potato, since they are hollowed out, the pulp whipped nicely, then stuffed back into their jackets and baked again. Little two-bite twice-baked new potatoes, how delightful! Add a little dollop of sour cream and a little caviar – now we are talking indulgent!

The potatoes can be served as a passing appetizer, your own “fancy snack” or even as a side to dress up steaks if you like. I’ve served them with grilled steak and pan seared asparagus tips – yum!

Still looking for Caviar ideas? Try Party Potato Platter with Fresh Dill and Red Caviar. I love these during the holidays – the green of the dill and the red of the caviar – beautiful!

Twice Baked New Potatoes with Caviar
1 1/2 lb. small new potatoes, 12 to 16, unpeeled and well scrubbed
4 tablespoons olive oil, divided
3/4 cup sour cream or crème fraîche
2 teaspoons finely chopped fresh chives
1/4 teaspoon sea salt
Pinch of freshly ground white pepper
2 oz. any variety of caviar or fish roe
Fresh flat-leaf parsley sprigs or watercress for
garnish

Preheat an oven to 475 degrees.

Scrub potatoes well, pad dry with paper towels. Place potatoes in a bowl and add 2 tablespoons of olive oil to the bowl. Oil potato skins well with olive oil. Place the oiled potatoes on an ungreased baking sheet. Bake until cooked through and slightly crispy, 45 to 50 minutes; prick with a knife or skewer to test for doneness. About half way through baking time, shake baking sheet to redistribute the potatoes and allow for more even baking.

Remove from the oven and let cool. Reduce oven to 425 degrees.

Cut each potato in half crosswise. If the ends of any potatoes are uneven, cut off a thin slice from them so they will stand upright once they are filled. Carefully scoop out all the pulp from each half, leaving only a thin shell. Place the pulp in a bowl and return the potato shells to the baking sheet, hollow sides down. Brush the skins with remaining oil. Once brushed with oil, turn potatoes hollow side up. Set aside.

Add 1/2 cup of the sour cream, the chives, salt and white pepper to the potato pulp and mix well. Using a small teaspoon, spoon the pulp mixture into the shells. Place the filled potatoes on the baking sheet. Bake until heated through, 10 to 15 minutes.

Arrange the warm potatoes on a serving platter. Garnish each potato with a dollop of the remaining sour cream, then of caviar. Garnish the platter with parsley sprigs and serve immediately.

Pasta Amnesia

Pretty as a picture. When I saw this, it just screamed Classy – Elegant – Beautiful!!! However; the recipe instructions contained at allrecipes.com did not match the photo – the smoked salmon was chopped and cooked into the sauce. The caviar was tossed into the pasta to give it color. Now I don’t mean to be picky, but do you see big pieces of salmon sitting atop a twirl of pasta, with a beautiful Caviar garnish or is that just me? (As it turns out, allrecipes.com isn’t the only posting that is using the same photo with instructions that aren’t even close to the pretty picture).

So, we are winging it, people. The up side is we have a basic list of ingredients – easily tweaked. Now to tweak the instructions to render a dish that matches the photo.

Pasta Amnesia
Pasta and Cream Sauce
6 Pasta Nests (your choice of type)
1-1/2 cups cream
6 oz smoked salmon, chopped
1-1/2 pinches freshly grated nutmeg
1-1/2 pinches ground black pepper, or to taste
1 Tablespoon flat-leaf parsley,

Bring a large pot of lightly salted water to a boil. Drop pasta nests into boiling water, and cook until al dente. Using a slotted spoon, remove nests from water. Drain on paper towels.

Meanwhile, place cream in a small saucepan, over medium-low heat. Stir in the chopped smoked salmon. Season with nutmeg and black pepper. Stir frequently until thickened.

Place drained pasta onto serving platter, small individual plates or Asian spoons. Drizzle the cream sauce over the pasta. Sprinkle each nest with caviar. With a fork twist nests carefully, taking care not to disturb their shape, until some of the caviar has broken and colors the pasta slightly. Sprinkle with a little parsley for added flakes of color.

Garnish
3 oz Smoked Salmon, cubed
3 teaspoons black caviar, divided

Place a small cube of salmon in center of each nest. Top salmon with a little caviar.

Bacon-Onion Barbecue Meatballs

“We are having a pot luck”. Those dreaded words from a co-worker. It means coming up with something that can be made in advance – or at the very least started in advance, that can be easily transported and that will satisfy a crowd.

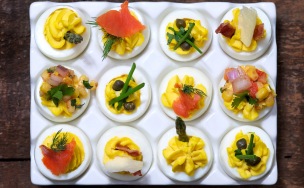
jan 2013 024You know me, and my usual standby – deviled eggs. Deviled eggs transport easily – can be dressed up for an awesome presentation and most people like them. Frankly, I was growing tired of being the Queen of the deviled egg platter. Besides, making fancy deviled eggs takes time. (Check out my The Deviled Egg You Say! if you need some ideas in that department). Another reason I chose to skip the deviled eggs is because I plan to experiment with deviled quail eggs and caviar in the very near future – something for another occasion, not a big office party.

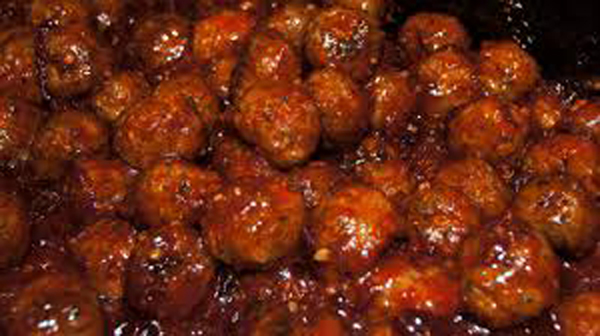
Meatballs are another sure crowd pleaser. I’ve already done my Teriyaki Meatballs – Crock Pot Style for the gang at work. It was another of those been there, done that recipes. When I got up this morning, I knew I was going to make Barbecue Meatballs. The plan was to throw frozen meatballs into a crock pot along with a bottle of barbecue sauce and call it a day. Then it struck me – why not go beyond the quick slam it through rendition of barbecue meatballs? Some bacon in the sauce would be nice. Oh, and sweet onions . . . now we’re talking . . .

Bacon-Onion Barbecue Meatballs
3 Slices Smoked Bacon, chopped
1/4 Onion, chopped
40 Frozen Meatballs
1 Bottle Sweet Baby Ray’s Hickory Honey Barbecue Sauce

Lay 3 slices of bacon in a stack. Using a sharp knife, slice bacon lengthwise into four strips. Cut strips width-wise to create chopped bacon bits.

Heat a dutch oven over medium heat. Crumble bacon and saute in dutch oven until almost crisp. While bacon is frying, chop onion. Toss onion into dutch oven with bacon and continue to fry until bacon is crisp and onions are nicely browned in bacon grease.

Place frozen meatballs into dutch oven. Using a large spoon, stir the pot to incorporate the meatballs with the bacon and onion.

Pour the barbecue sauce over meatball mixture, stir well. Heat over medium-low heat until the barbecue sauce just begins to bubble. Transfer everything into a crock pot. (If taking this to a pot luck or other function, now would be the time to pack it up for transportation).

Set crock pot to HIGH heat for about an hour or so, until the meatballs are heated through. Turn crock pot to LOW and continue to simmer until ready to serve, stirring occasionally.

Japanese Glazed Chicken Wings

Since I seem to be on this Asian cooking kick lately, I thought I might reintroduce a recipe from 2014. The original Japanese Glazed Chicken Drumsticks were meant to serve as the main entrée with a big bowl of rice. Since then, I have adapted the same recipe to make wonderful appetizers or if you will “finger food”.  It’s been a big hit with my guys. While there is a little work involved; these are so delicious it’s well worth the effort. Just be sure to include some wet-wipes as the chicken is sticky-good.

These sticky glazed wings can also travel to a party. Instead of serving on a platter, place the wings in a chafing dish. Upon arrival, pop wings in the oven for a few minutes to warm, then sprinkle with green onions and sesame seed. The chafing dish should keep the wings nice and warm for the festivities.

Japanese Glazed Chicken Wings
1 package (3 lb) frozen chicken wings, thawed
1/2 Cup Water
3/4 cup balsamic vinegar
2/3 cup Japanese soy sauce (Kikkoman’s)
2 1/2 tablespoons ultra fine sugar
4 garlic cloves, peeled and bruised
1 small hot chili peppers, slit open, seeds removed
2 Green Onions, chopped for garnish 

1-2 Teaspoons Sesame Seeds

Peel and bruise garlic. Chop hot chili peppers. Place in a small food processor and process until a paste forms. Spoon paste into a sauce pan. Add water, vinegar, soy sauce and sugar to the pan and bring to a boil over medium-high heat, stirring constantly until sugar has dissolved. Lower heat and simmer for about 40 minutes or until reduced to a thick glaze. 

Meanwhile; preheat oven to 425 degrees.

Line 2 rimmed baking sheets with foil and spray with cooking spray.  Divide chicken and spread in a single layer for even cooking and easy of turning. (If you have one large pan that will accommodate all the chicken, by all means use it). Bake wings about 40 to 45 minutes or until cooked through and no longer pink, turning mid-way through the baking process.

Remove wings from oven. Pour off any pan drippings from chicken so that pan is dry and will not thin glaze. Pour glaze over chicken and toss until well coated. Return chicken to oven and continue to bake until glaze is sticky, about 10 minutes more.

Arrange the chicken on a serving platter. Garnish with chopped green onions and sesame seeds just before serving.

************

Suggested Asian-Inspired “Finger foods” for casual entertaining – Filipino Egg Rolls; Pot Stickers; Filipino BarbecueSpicy Grilled Shrimp; and Teriyaki Meatballs. Now we’re talking party time!

Rethinking the Taco Ring – It’s Game Time!

Let me start by saying I am sorry I did not photograph the “process” as I should have for prosperity and this post. My family was waiting for supper, and had a movie on “hold” until I could join them, so I was in a bit of a rush. Besides, I wasn’t entirely certain that what I was attempting to do would come out beautifully or turn into a giant blob in the end. As it turns out, what I had imagined in my head actually translated nicely for the finished bake.

I wanted to turn the Mexican Taco Ring into a spicy “football” for Super Bowl Sunday. At first, I thought I would create the Mexican Taco Ring, shaping the open center into the football. As I narrowed the opening and pulled the crescents more tightly together, there was less room for the filling. I know that sounds crazy, but it’s true. By narrowing the center, you are actually using four less triangles. Less triangles equates into less filling space. However; by closing the opening in the center, you actually end up with more space. So I used two of the remaining triangles to fill in the center. The filling was piled on, and shaped into a football. Draw up the points, encasing everything into the dough. Then it was a matter of filling in the small gaps and creating “lace” from the remaining two triangles. Pop it into the oven; bake and there ya go – a delicious, spicy; eatable football.

This football was created in a rush. Come Super Bowl Sunday, I’ll take more time, refining and smoothing the ball before placing the lacing on top. I might also incorporate an egg wash for a better sheen. Now that I know it can be done, I’ll be doing it better.

Spicy Football Taco
1 lb ground beef
Taco seasoning to taste
1 cup shredded Mexican Blend cheese
2 tablespoons water
2 packages refrigerated crescent roll dough
1/4-1/2 cup sliced Nacho Style Jalapeno Peppers (optional)
1 cup salsa
1/2 Cup Sour Cream

Preheat oven to 375 degrees

Cook ground beef. Drain well.

Return ground beef to the pan. Add taco seasoning, cheese, water and Jalapeno peppers.  Stir until blended and cheese has melted into the meat. Set aside until ready to use.

Spray a baking sheet lightly with cooking spray. Arrange all but four of crescent roll triangles, overlapping, on baking sheet to create a football shaped opening in center. Once satisfied with opening, fill in the center “gap” with two of the remaining four triangles.

Spoon meat mixture over crescents and shape into a “football”. This will become the defining “mold” for your finished bake. Fold points of triangles over filing, drawing together in the center to cover as much of the filling as possible. If there are spots still exposed, use one of the remaining two triangles to fill in the gaps. Pinch pieces together and smooth out as much as possible to create a seamless football. 

Use remaining triangle to create strips. The first strip should be the length of the ball. This is your center seam. Cut smaller strips to lay in an X pattern over the center seam to create football lacing.

Bake 17 to 22 minutes or until golden brown.

To serve, cut into desire serving pieces. Top slices with a dollop of sour cream and salsa, if desired.

Here’s to the Super Bowl and all the commercials we tune in to see!

Notch It Up Nachos

Those of you who have been following for a while might remember our family “Movie Night” – watching movies together on the sofa with all the “junk” food you could get in the theater. (And for a heck of a lot cheaper!). We use to do “Movie Night” more often, when Kiddo was still a kid. We still have family “Movie Night” every now and again – renting two or three movies for the night and treating ourselves to Movie Night Hot Dog Delight, plenty of hot buttery popcorn, “Movie” candy and let’s not forget the nachos.

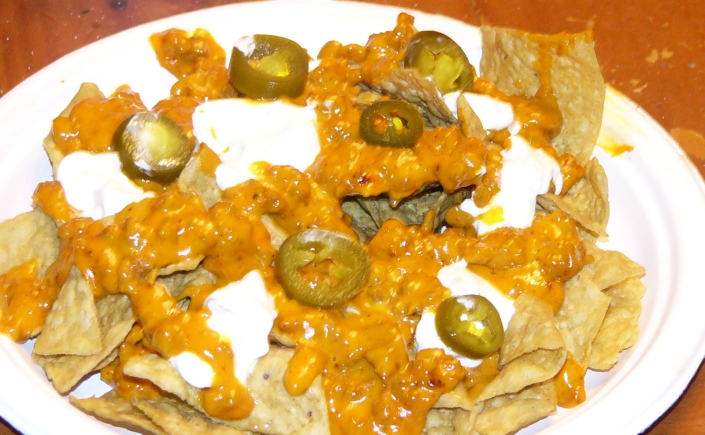
Recently we had one of those stay at home night’s out. Instead of making the regular cheese nachos with plenty of Jalapeno peppers, we decided to kick it up a notch by adding chorizo to the cheese and heaping on the sour cream. Yum!

And just for the record, on the screen was the latest Mad Max installment (guys choice) and Tomorrow Land. I love spending time snuggling up together on our big sofa, munching on “theater” food and just enjoying the evening together.

Notch It Up Nachos
1 lb Ground Chorizo Meat (the good stuff)
2 Containers Frito Cheese Dip (Hot)
1 Jar Nacho Sliced Jalapenos
Sour Cream
Tortilla Chips

In a cast iron skillet over medium heat, brown Chorizo. Crumble meat as it cooks just as you would ground beef. Drain off any excess grease.

Open cheese dip, pour over chorizo and stir to blend. Continue to heat over medium-low until cheese is hot and bubbling.

Spread chips evenly on a large serving platter or individual plates. Ladle cheese mixture over chips, top with sour cream and nacho style Jalapeno peppers.

Enjoy!

Prosciutto Wrapped Asparagus in Crisp Phylo with a Hollandaise Dipping Sauce

I love asparagus. I love it steamed, grilled, pan-fried and just about any way in between including asparagus soup. While asparagus is generally an early spring crop, in most well-stocked markets, it can be had throughout the year. The younger, narrow asparagus render the best, most delicate flavor. The older, thicker stalks tend to be more woody, tough and somewhat bitter. Most of the issues with a later harvest can be overcome simply by “trimming” the wood (bend the stalk, it will snap where the “wood” begins) and using a vegetable peeler to remove some of the tougher outer skin, revealing the light color within.

To me, asparagus and Easter go hand in hand. I suppose this stems from the fact that the height of the asparagus season in California is late March through April. I adore blanched asparagus wrapped in thin slices of ham as an appetizer for Easter. So you can appreciate my excitement when I came across a recipe at Wives With Knives (love the name!) that took the concept of ham wrapped asparagus one step further by added Phylo Pastry. (See original recipe at http://www.wiveswithknives.net/2012/06/05/prosciutto-wrapped-asparagus-in-crispy-phyllo/)

It’s pretty, presents well and the asparagus can be assembled ahead of time. If desired, add a strip of roasted red bell pepper to the wrap for a hint of red and green. Won’t that be nice at Christmas time?

Prosciutto Wrapped Asparagus
24 large asparagus spears
½ pound prosciutto or very thinly sliced deli ham
1 package Phylo pastry
½ cup unsalted butter, melted
¼ cup freshly grated Parmesan cheese
Freshly ground black pepper

Preheat the oven to 400 degrees.

Trim asparagus spears to about 7″ long. Peel the bottom 3-4 inches of the spear with a potato peeler. Bring a large pot of water to a boil and blanch the spears for 30 seconds. Do not overcook asparagus at this point as they will finish cooking in the oven. Remove asparagus from the water and cool on a wire rack or plate.

When spears are cool, snugly wrap each one in a small piece of ham.

Open the pastry sheets and remove one at a time from the packet. Cut the sheets in half on the narrow side. Brush lightly with butter. Lay an asparagus spear on the pastry. Sprinkle with a little Parmesan cheese and a bit of black pepper.  Roll as tightly as possible and place on a baking tray. Repeat with remaining asparagus.

Brush rolls with a little more melted butter and sprinkle with a pinch of Parmesan cheese. Refrigerate tray until ready to bake. These can be made in advance to this point. Just cover with plastic wrap and refrigerate until you are ready for them.

Bake in a 400 degree oven for 10-12 minutes or until golden brown. Pile the spears on a plate and serve warm with Hollandaise Sauce for dipping.

Hollandaise Sauce
2 egg yolks
1 tablespoon lemon juice
1 pinch fine sea salt
1 pinch white pepper
Pinch of cayenne pepper
1 stick unsalted butter, melted and cooled slightly

In a small, heavy saucepan over low heat, whisk the egg yolks, lemon and lime juice and water constantly until the mixture begins to thicken and continue whisking for about 1 minute more, but remove the pan from the heat as soon as the mixture thickens.

Transfer the mixture to a blender, add the salt, white pepper and cayenne pepper and blend until smooth. Turn blender off, and allow to cool for 1 minute.

With the motor running, slowly pour in the melted butter in a thin stream until incorporated. Taste and adjust the seasonings. Transfer the sauce to a saucepan and keep warm over very low heat.

Transfer sauce to a bowl and serve with asparagus as a dipping sauce.

Boozy Bourbon Meatball Appetizers

11800202_10204361866028736_4086208904623013397_nYesterday our family held our 1st Annual Celebration of Brother Dear’s Life and Cat Food Drive. Brother Dear would have been fifty-eight years old this month. For those of you who are new to my blog, my brother lost his fight with cancer last December. He was a loving, gentle soul with a heart as big as all outdoors who took on an awesome responsibility of caring for stray cats until he became too ill. To honor him as a family, we have taken up his cause, and collect bags of cat food to donate to his favorite no-kill shelter. Brother Dear’s passing has taught us two valuable lessons – always appreciate those around you while they are still with you and to care for God’s creatures – we are all stewards of this planet.

My sister held our 1st Annual Celebration at her 100-year-old home in the country. She and her hubby have been restoring their Craftsman home to its original beauty – a hands on project that is now four years into the tear-down/restoration process. Since they are doing the vast majority of the restoration as weekend projects, the home has a long way to go. Their kitchen has no cupboards or counters. While the floorboards are in (although not “finished”) and a functioning antique stove has been installed, the kitchen is definitely a work in progress. My talented brother-in-law does most of the cooking in the detached garage, outdoor fire pits and smokers. His out-of-the-box cooking is out-of-this-world delicious. Last night’s spread was no exception.

My contribution was appetizers. Back by request were two dishes I had brought to our get together last year. It was the last time we would gather as a family that included Brother Dear in reasonably good health. (We knew he was sick, and his time was limited, but he was well enough to enjoy everyone). Both were a hit last year, and again this year. So glad because they are yummy, travel well and can be served at room temperature. Considering the state of my sister’s kitchen, all important point when selecting foods to bring. (Recipes can be found here: Sunny Spinach Pie and The Importance of Sunny Pepperoni Pie).

This year I added some yummy Bourbon Meatballs – knowing that these round, flavorful balls would have received Brother Dear’s stamp of approval. They are easy to make, travel well and require little attention once complete – all important points.

The recipe is not new – variations have been floating about for a few years now.  My contribution to the recipe was to add a few tablespoons of barbecue sauce to the mix. While I love the subtle change the barbecue sauce brought to the original recipe, since it’s only a few tablespoons it’s purely an optional thing. I used what was in the fridge. If you don’t have an open bottle laying about, by all means skip it.

Boozy Bourbon Meatball Appetizers
2 lbs Frozen Meatballs
1 cup Ketchup (Heaping)
3/4 cup Brown Sugar, Packed
1/2 cups Jack Daniel’s Bourbon Whiskey (or whatever you have on hand)
2 teaspoons Fresh Lemon Juice
2 teaspoons Worcestershire Sauce
3 tablespoons Barbecue Sauce (I used Boozy Bourbon Bacon flavor)

In a large saucepan, combine all ingredients except the meatballs. Over medium heat, warm sauce until just beginning to bubble. Taste and adjust barbecue sauce if desired.

Place the frozen meatballs into a large crock pot, and pour warm whiskey sauce in on top. Mix it around so each meatball is coated in the whiskey sauce.

Heat on HIGH for about two hours, stirring a couple of time to make sure meatballs are well-coated.

Once the meatballs have begun to heat through, turn the crockpot down to LOW setting and continue to warm.  Occasionally check and stir to prevent the sauce from scorching. Once heated through, turn crock pot to WARM.

Serve and enjoy!